


I hadn't had the chance to dress up for Halloween for the better part of a decade, but in 2008 I got invited to three separate parties. Inspired by a sketch on Little Britain, I came up with a Baby Jesus costume that won me a trio of best costume honors. I've been stuck having to live up to that achievement since then.
This year, I have been so excruciatingly busy that I hadn't really gave any thought to what I would be wearing until I wandered through the Halloween section at Target. I spotted a large light-up decorative Jack O'Lantern and thought, "I could get my head in there." (That's actually the only way I can judge relative size, by whether or not I can get my head in there. It makes parallel parking difficult.)
You will need:
- A bigass Jack O'Lantern from Target ($30)
- 1/2 yard of black gauzy material ($2-3)
- Heavy duty sticky back Velcro ($3)
- Battery-powered emergency road flare ($10)
- A measuring tape, some duct tape, scissors, string, and a pencil ($0 - it's all in your junk drawer)
- Old clothes ($0-50)
- Cheap workman's gloves ($2)
- A Garden Implement of Doom ($0-20)
- Raffia ($6)
- An uncle with power tools (priceless)
The plastic used for the Jack O'Lantern is deceptively tough. My Dremel could barely cut a groove in it, and an electric hand saw fared no better. Give it to your uncle with power tools. He knows what he's doing. Once you get the pumpkin back, you'll want to make sure you can get your head in and out of it easily. Did you remember to leave enough room for your glasses? Dumbass.
Everything looks pornographic on the internet.
Second Step: Tell her she's the one you're dreaming of. Now you'll want to rig up the inside. You'll find that it's pretty roomy in there. Those of you with mad technical skillz may want to hook up some LED's and a sound system. I can barely post crap to this blog, so I just picked up a small electronic road flare at Fry's. The idea was to create a flickering flame effect with the blinking red light, and it actually worked well in practice. Use Velcro to fix the flare to the bottom of the pumpkin shell; the flare weighs a bit once the batteries are in, which is why you need the heavy duty stuff to keep it in place.
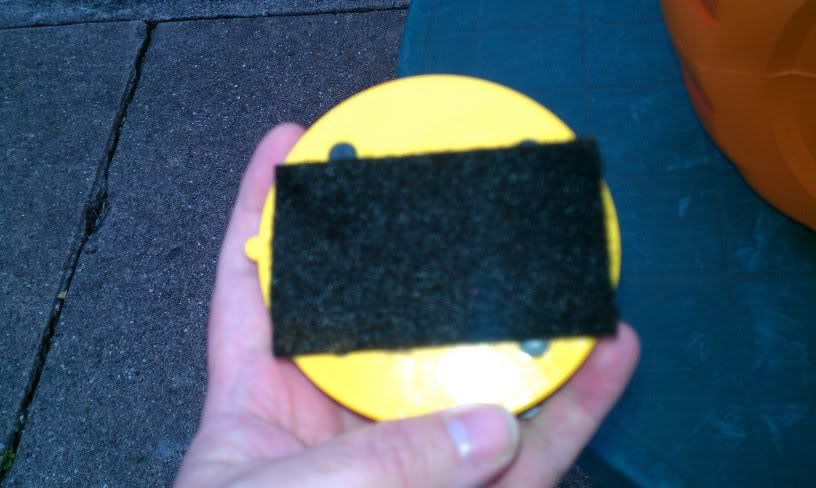
The device with Velcro attached. It probably wasn't necessary to illustrate this part.
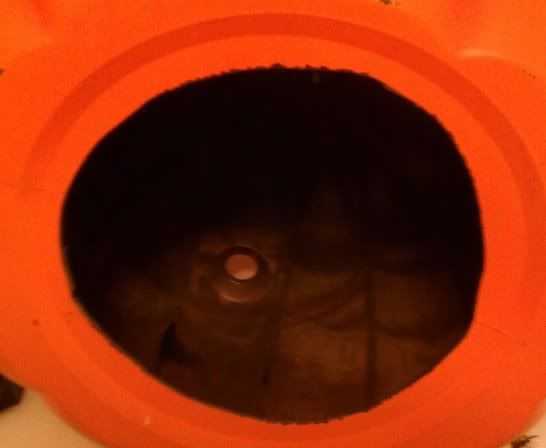
The device affixed to the inside of the Jack O'Lantern. Place it near the bottom for the eeriest effect.
Third Step: Hold her in your arms and never let her go. Once you have your LED's or flare hooked up, you'll want to add the black gauze to the inside of the pumpkin. The idea is to prevent people from getting a good look inside the Jack O'Lantern while still making sure you can see out. When buying the fabric, test it out by holding it about four or five inches in front of your face to make sure it's not too opaque to see through. Once you've selected your fabric and brought it home, lay it across the face of the Jack O'Lantern to see how much you'll need to cover the all the holes. (Heh-heh.) Cut away the excess, but remember to leave about an inch all around to work with. There's not enough room to maneuver a hot glue gun through the bottom of the pumpkin, so I used duct tape to attach the fabric and even then I was working blind. Make sure you stretch the fabric tight so you don't choke on it after a few beers. How are you drinking with that damn thing on your head, anyway?
All things considered, this is actually a pretty neat job.
Fourth Step: Follow that restraining order to the letter. Once the Jack O'Lantern head is ready, you can slap together the rest of the costume. Cut short strands of raffia and duct tape them to the inside of your pants cuffs so they stick out through the bottoms. (You can do the same thing with your shirt cuffs if you don't care if you drag raffia through the salsa.) Loop raffia around your shirt buttons, stick some out of your pants, and drape some more over your shoulders. Use duct tape to bind the strands together if you don't want them all over the place.
And that's it. Apart from getting the hole cut, it took me literally twenty minutes to put the rest of the costume together; flare, gauze, raffia, and all. In my rush to get to my family's annual party, I forgot the work pants I had planned on wearing but the raggedy old jeans I had in my car trunk worked out okay. Overalls would probably look spiffiest, especially with fake blood sprayed on them like I did with my gloves. The pitchfork was borrowed form my mom's garage; depending on where your party's held at real gardening implements may not be welcome, so you'll want to grab a toy machete from the Halloween aisle instead. I was never one for face paint myself, but if you're not adverse to make-up a skull or zombie face might look pretty cool under the mask and could probably save you the hassle of the black fabric.

I'm not fat, I'm overstuffed.
Oh, and in case you're wondering about the Baby Jesus costume, I don't have any pictures but I can try to describe it:
- Get a cardboard box (I think I used this one and cut the height down by half) and cut a hole in the bottom a little smaller than your head. Start real small, as it's easier to make it bigger than vice-versa, and remember that cardboard has plenty of give.
- Line the outside of the box with wood grain contact paper for an authentic look.
- Take a plastic baby doll and remove the head. If it doesn't pop right off, run hot water over the neck.
- Use a box cutter or thick Exacto to cut two vertical slits about an inch apart at the base of the doll's neck.
- Slide heavy duty sewing elastic through the slits and tie the loose ends together. Use just enough elastic so that you can slip the loop over your head and still keep the doll's body firmly in place beneath your chin.
- Again with the duct tape and raffia! This time, tape the strands around the inside edges of the box.
- Get a cheap beige bedsheet and arrange it at the bottom of the box.
- Get a cheap black flat bedsheet and cut a hole in the center for your head. Slip it on like a pancho. Put on a pair of black gloves.
- Slip your head through the hole in the box, position the bedsheet to hide your neck, slip on the doll body, and voilà!
Hope this gives you procrastinators some ideas. Me, I gotta start thinking about next year's costume.
0 comments:
Post a Comment